
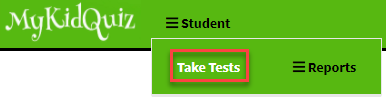
After a test is assigned to a student, the student can login to MyKidQuiz and begin the test. To take a test, press the Student menu and then the Take Tests sub menu as shown above in the application.
The following describes each field 1 through 4 and how it is used in the application. Upon entering the Take Tests screen from the menu, the student will see a list of their tests. From the list, you can begin a new test, or view/print a completed and graded test.
Note: This section focuses on beginning and completing a student test. The Status, Student Test, and Student Graded (Test) columns are explained in another section of the help page below.

(1) Show entries when pressed presents a drop-down list with the values of 10, 25, 50, and 100. The number selected will translate to the number of student test entries displayed on the screen.
(2) Search can be any value that when entered will filter only those student tests where a match is found in the columns.
(3) Begin when pressed will take you to the Student Test Detail screen where the student will be presented with the first question.
(4) Pagination when pressed will allow you to navigate to the Previous, individual numbered, or Next page of student tests. If 10 or less student tests exist or 10 student tests are displayed based on the minimal value of 10 in the Show entries field, then the pagination will display just 1 page and the pagination will be disabled. If multiple pages exist, then the Previous, individual numbered, and Next buttons will be available for navigation.
After pressing the Begin link, the student test header information and the first question as shown in the application below.

Toggle Student Test Header is a toggle as shown highlighted above. The toggle's default is "on" when shown as green.
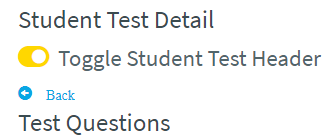
Click the toggle button to hide the header information. The toggle is now "off" when yellow as shown above. This provides more real estate when viewing the student test questions.
The following describes each field 1 through 16 and how it is used as shown in the application above.
(1) Test Subject Name displays the test subject selected when the Test was created by teacher.
(2) Questions are the number of questions associated with the created Test.
(3) Time Remaining shows the remaining time the student has to finish the test. If the time reaches zero (00:00:00) before the student submits the test as complete by pressing the Submit Test button, the application will auto-submit the test. The Time Remaining is displayed for a Time-Based test only. See the Tests documentation on how to set up a Time-based test.
Note: If the student exits the Student Test prematurely in any way whatsoever, they will not be allowed back into the test. The student's test must be reset by the teacher along with an adjustment to the time remaining.
(4) Test Name displays the test name selected when the Test was created by the teacher.
(5) School Year displays the School Year selected in the School Profile created by the teacher.
(6) Student Grade displays the student's school grade selected in the Student record created by the teacher.
(7) Date Due displays the date the student test is due to be completed by the student entered in the Test Assignment by the teacher.
(8) To submit the Student Test when complete, press the Submit Test button. After the Student Test is submitted, you will be redirected back to the Take Tests screen where you will be able to View the completed Student Test in read-only mode.
(9) Back when pressed will send you back to the previous screen.
(10) Left arrow button when pressed will send you back to the previous question. If you are currently on the first question, then it display the last question.
(11) Question Links when pressed will send you directly to the numbered question.
(12) Right arrow button when pressed will send you forward to the next question. If you are currently on the last question, then it display the first question.
(13) Question Label display the question number and the question type.
(14) Checkbox when pressed will highlight purple the Question link displayed in illustration 11 as a bookmark reminder. For example, you may want to bookmark a question you many not have yet answered.
(15) This is the Question entered when the Test was created by teacher.
(16) This is an Image attached (optional) when the Test was created by teacher.
(17) Enter your answer is the student's answer to the question (Paragraph Text).
The following describes the remaining question types 1 through 6 and what is needed to answer the question.

(1) True/False as shown above, the following describes each field A and what is needed to answer the question.
(A) Choose answer by clicking one radio button is where you can press only one radio button (TRUE or FALSE) as the correct answer.

(2) Multiple Choice as shown above, the following describes each field A and what is needed to answer the question.
(A) Check your answer is where you can press only one checkbox as the correct answer.

(3) Multiple Select as shown above, the following describes each field A and what is needed to answer the question.
(A) Check your answers is where you can press one or more checkboxes as the correct answer.

(4) Multiple Answer as shown above, the following describes each field A through D and what is needed to answer the question.
(A) Enter your answers is where you enter your first correct answer. The field, of left blank, will be marked as incorrect at time of grading.
(B) Enter your answers is where you enter your second correct answer. The field, of left blank, will be marked as incorrect at time of grading.
(C) Enter your answers is where you enter your third correct answer. The field, of left blank, will be marked as incorrect at time of grading.
(D) Enter your answers is where you enter your fourth correct answer. The field, of left blank, will be marked as incorrect at time of grading.

(5) Spelling as shown above, the following describes each field A through F and what is needed to answer the question.
(A) Volume is a dropdown list consisting of volume levels when playing the spelling word/instructions through your speakers or headsets.
(B) Rate is a dropdown list consisting of speeds when playing the spelling word/instructions through your speakers or headsets.
(C) Pitch is a dropdown list consisting of sound pitches when playing the spelling word/instructions through your speakers or headsets.
(D) Play is a button when pressed will play the Spelling Word through your speakers or headsets.
(E) Enter your answers is where you enter the correct spelling of the Spelling Word heard when pressing the Play and Help buttons.
(F) Help is a button when pressed will play the Instructions where you can hear the Spelling Word in a sentence through your speakers or headsets.

(6) Matching as shown above, the following describes each field a through e and what is needed to answer the question.
(a) Item #1 is a textbox where you enter the correct corresponding Match # (A through E) of the second column representing a US state.
(b) Item #2 is a textbox where you enter the correct corresponding Match # (A through E) of the second column representing a US state.
(c) Item #3 is a textbox where you enter the correct corresponding Match # (A through E) of the second column representing a US state.
(d) Item #4 is a textbox where you enter the correct corresponding Match # (A through E) of the second column representing a US state.
(e) Item #5 is a textbox where you enter the correct corresponding Match # (A through E) of the second column representing a US state.
After a student has completed a test, they can now view the test. To view a test, press the Student menu and then the Take Tests sub menu as shown above in the application.
The following describes each field 1 through 6 and how it is used in the application. Upon entering the Take Tests screen from the menu, the student will see a list of their tests. From the list, you can begin a new test, or view/print a completed and graded test.
Note: This section focuses on viewing a completed test. The Student Graded (Test) column column is explained in the last section of the help page below.

(1) Show entries when pressed presents a drop-down list with the values of 10, 25, 50, and 100. The number selected will translate to the number of student test entries displayed on the screen.
(2) Search can be any value that when entered will filter only those student tests where a match is found in the columns.
(3) View when pressed will take you to the Student Test Detail screen where the student will be presented with the first question in read-only view.
(4) Status shows the value of Complete indicating that the student is viewing a test they have previously completed, but has not yet been graded.
(5) Print when pressed will produce the Student Test report which is an exact carbon copy of the completed student test including all the available questions, the available answers -- i.e., Multiple Choice, and the student's entered answer. The report will generate in a new window or tab. Once the report is rendered, you will be able to export the report to Microsoft Word, Excel, PowerPoint, a PDF, Tiff, MHTML (web archive), CSV (comma delimited), XML file with report data, and a Data Feed.
(6) Pagination when pressed will allow you to navigate to the Previous, individual numbered, or Next page of student tests. If 10 or less student tests exist or 10 student tests are displayed based on the minimal value of 10 in the Show entries field, then the pagination will display just 1 page and the pagination will be disabled. If multiple pages exist, then the Previous, individual numbered, and Next buttons will be available for navigation.
The following describes field 1 for Question #1 and how it is shown in read-only view upon pressing the View link to enter the completed test.
Note: This section focuses on viewing a completed test. The Student Graded (Test) column column is explained in the last section of the help page below.

(1) Your Answer displays the student's entered answer. Note that when you attempt to enter the Your answer textbox, a "Do Not Enter" symbol appears indicating that the textbox is in read-only mode. Changing the answer is not possible.
Note: All question types follow the read-only rules whether the question answer is a textbox, radio button, or a checkbox.
After a student's test has been graded, they can now view the graded test. To view a test, press the Student menu and then the Take Tests sub menu as shown above in the application.
The following describes each field 1 through 7 and how it is used in the application. Upon entering the Take Tests screen from the menu, the student will see a list of their tests. From the list, you can begin a new test, or view/print a completed and graded test.
Note: This section focuses on viewing a completed test. The Student Graded (Test) column column is explained in the last section of the help page below.

(1) Show entries when pressed presents a drop-down list with the values of 10, 25, 50, and 100. The number selected will translate to the number of student test entries displayed on the screen.
(2) Search can be any value that when entered will filter only those student tests where a match is found in the columns.
(3) Graded when pressed will take you to the Student Test Detail screen where the student will be presented with the first question in read-only view along with additional graded information.
(4) Status shows the value of Graded indicating that the student is viewing a test that haven been graded.
(5) Score shows the graded score the student received on the student test.
(6) Print when pressed will produce the Student Graded report which is an exact carbon copy of the completed student test including all the available questions, the available answers -- i.e., Multiple Choice, the student's entered answer, and the grading information. The report will generate in a new window or tab. Once the report is rendered, you will be able to export the report to Microsoft Word, Excel, PowerPoint, a PDF, Tiff, MHTML (web archive), CSV (comma delimited), XML file with report data, and a Data Feed.
(5) Pagination when pressed will allow you to navigate to the Previous, individual numbered, or Next page of student tests. If 10 or less student tests exist or 10 student tests are displayed based on the minimal value of 10 in the Show entries field, then the pagination will display just 1 page and the pagination will be disabled. If multiple pages exist, then the Previous, individual numbered, and Next buttons will be available for navigation.
The following describes each field 1 through 2 that has been added to the header of the Student Test Detail screen upon pressing the Graded link to enter the graded test.

(1) Score shows the graded score the student received on the student test.
(2) Teacher's Overall Comments shows the overall comments the teacher may have entered when grading the test.
The following describes each field 1 through 4 for Question #1 and how it is showed in read-only view along with the additional graded information.
Note: This section focuses on viewing a completed test. The Student Graded (Test) column column is explained in the last section of the help page below.

(1) Graded Symbol is a visual that denotes whether the question is correct, incorrect, or ignored (See the Grading documentation that explains an Ignored question). The following images denote an incorrect and ignored question.


(2) Your Answer displays the student's entered answer. Note that when you attempt to enter the Your answer textbox, a "Do Not Enter" symbol appears indicating that the textbox is in read-only mode. Changing your answer is not possible.
(3) Correct Answer displays the teacher's entered answer. Note that when you attempt to enter the Correct answer textbox, a "Do Not Enter" symbol appears indicating that the textbox is in read-only mode. Changing the teacher's answer is not possible.
(4) Teacher's Comments shows the comments the teacher may have entered when marking the question correct, incorrect, or ignored.
Note: All question types show the additional grading information and follow the read-only rules whether the question answer is a textbox, radio button, or a checkbox.
NOTE:
Hovering over some of the controls will display tooltips.